Microsoft Teams is a great tool to bring people together in meetings, allowing everyone to hear and see each other while sharing and collaborating on information. There are times you may want to take one or more video streams from a Teams meeting to bring into a central console or video streaming tool, allowing you the ability to create a production with your remote participants.
Well, you are in luck; Microsoft just rolled out NDI support inside of Microsoft Teams. Network Device Interface (NDI) is a high-performance standard that allows anyone to use real-time, ultra low latency video across your local network.
To utilize the NDI Streaming capability, users must first be enabled by an administrator of the tenant. The administrator must modify the “Meetings Policies” that apply to the users that need to be enable with NDI Streaming capability.
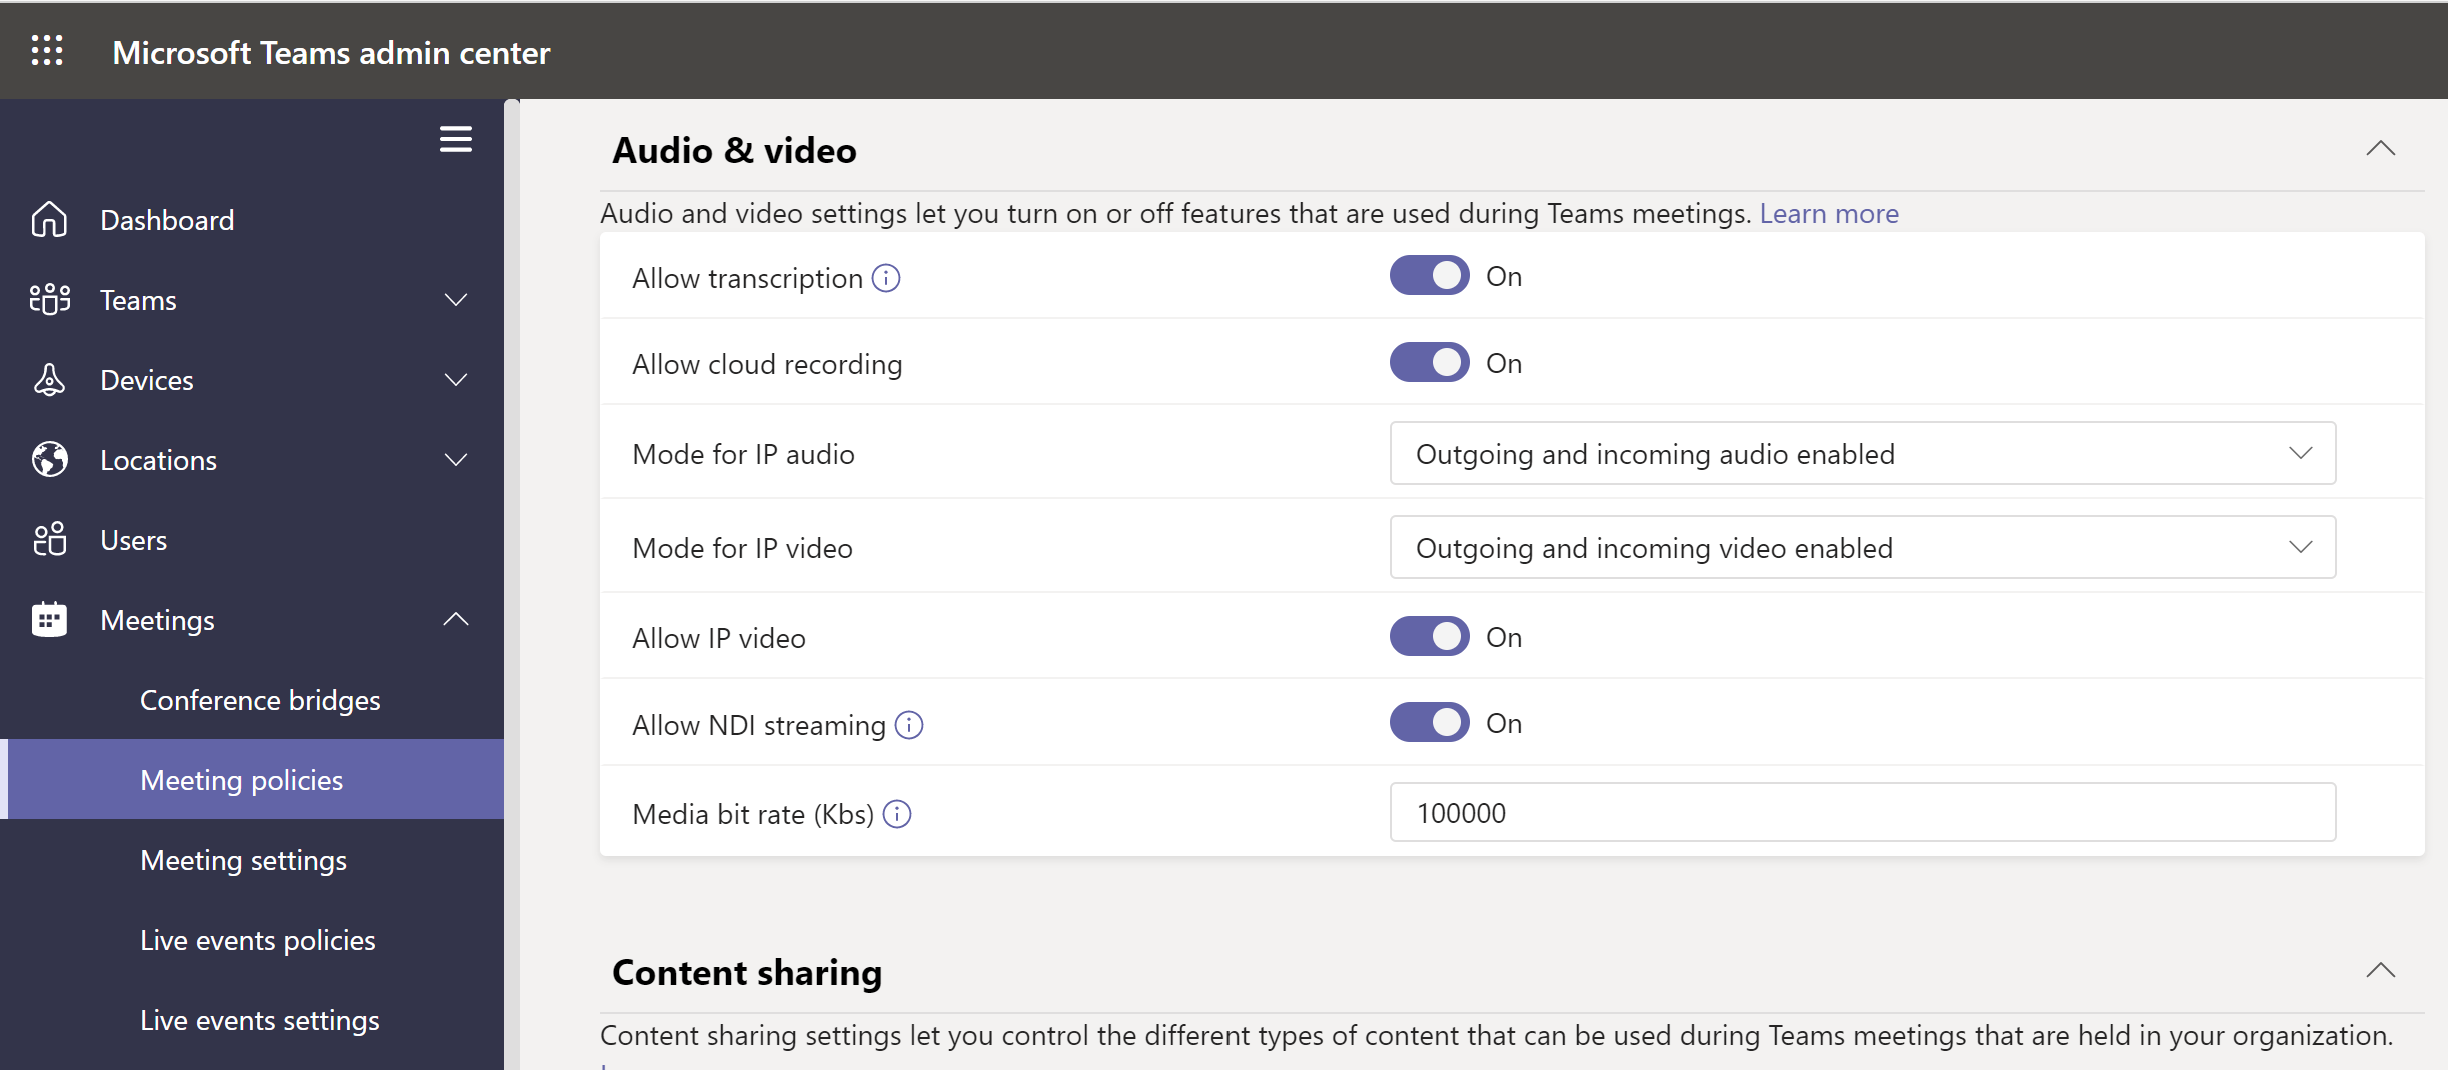
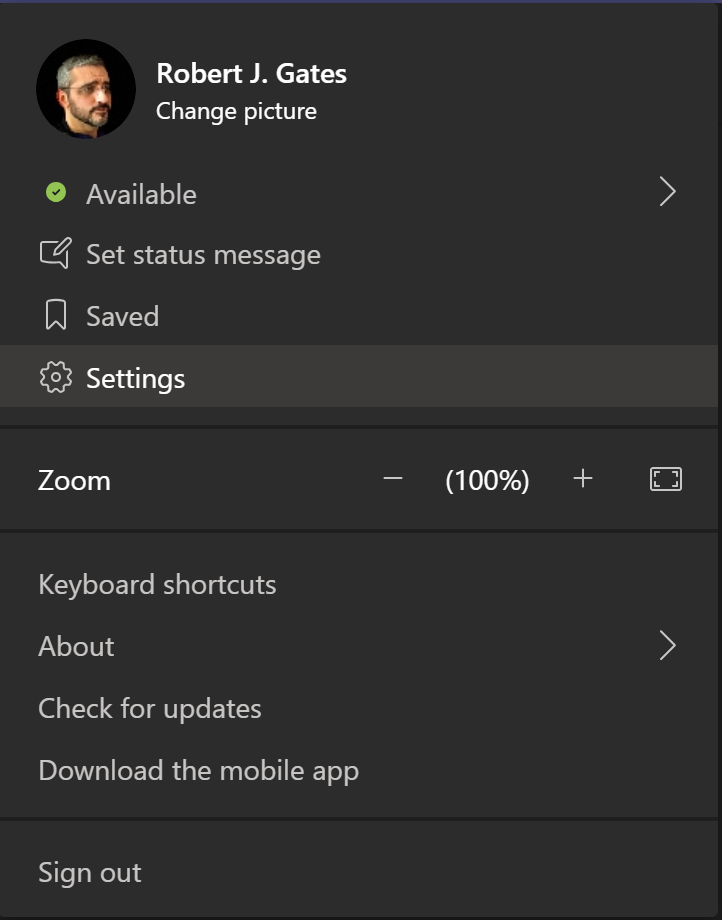
Once you have set “Allow NDI Streaming” to “ON” for the users who need the capability, it may take a few minutes before the setting is available on the user’s Teams client. Once the setting is available, you will see a new option under the Privacy settings within the Microsoft Teams client. Please note as of 9/7/20; this feature is currently only available on the Microsoft Teams Windows-based version.
To enable, the user simply needs to toggle the switch to on within the Microsoft Teams client.
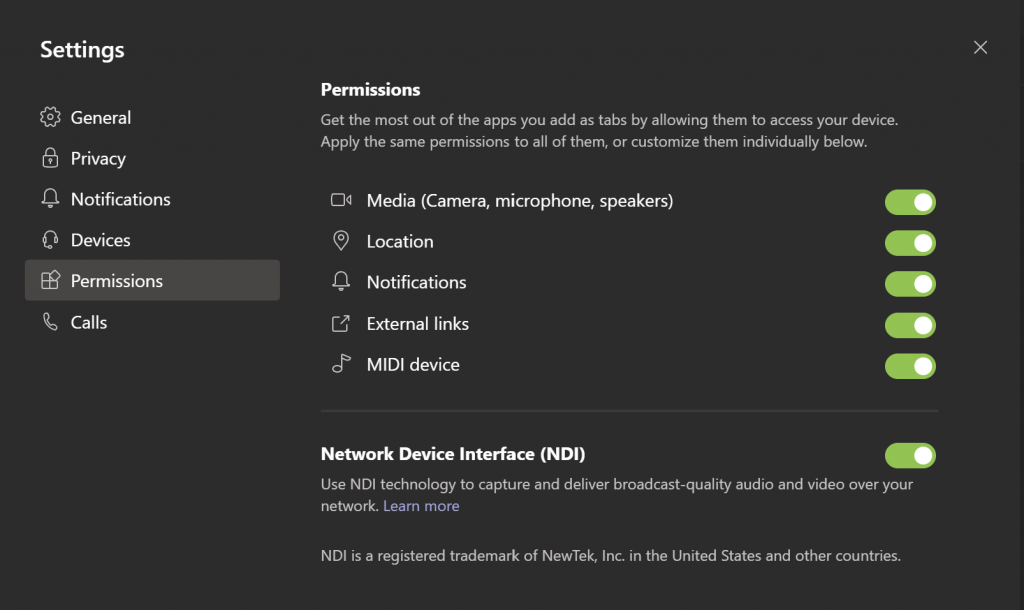
Once you have enabled the setting, the Microsoft Teams client will make the selected video streams available on the user’s local network. If you are using an NDI supported software or hardware device, you will see the various video streams available on the network. You can then make them available to embed the streams into your video production.
For the demo, I am using OBS Open Broadcaster Software. It is a free open source software that lets you produce live or recorded content from a variety of sources. In the following screen shot you can see that I have a list of available video streams too choose from. These streams come from an active Microsoft Teams meeting that I am running on my local network with three computers in total.
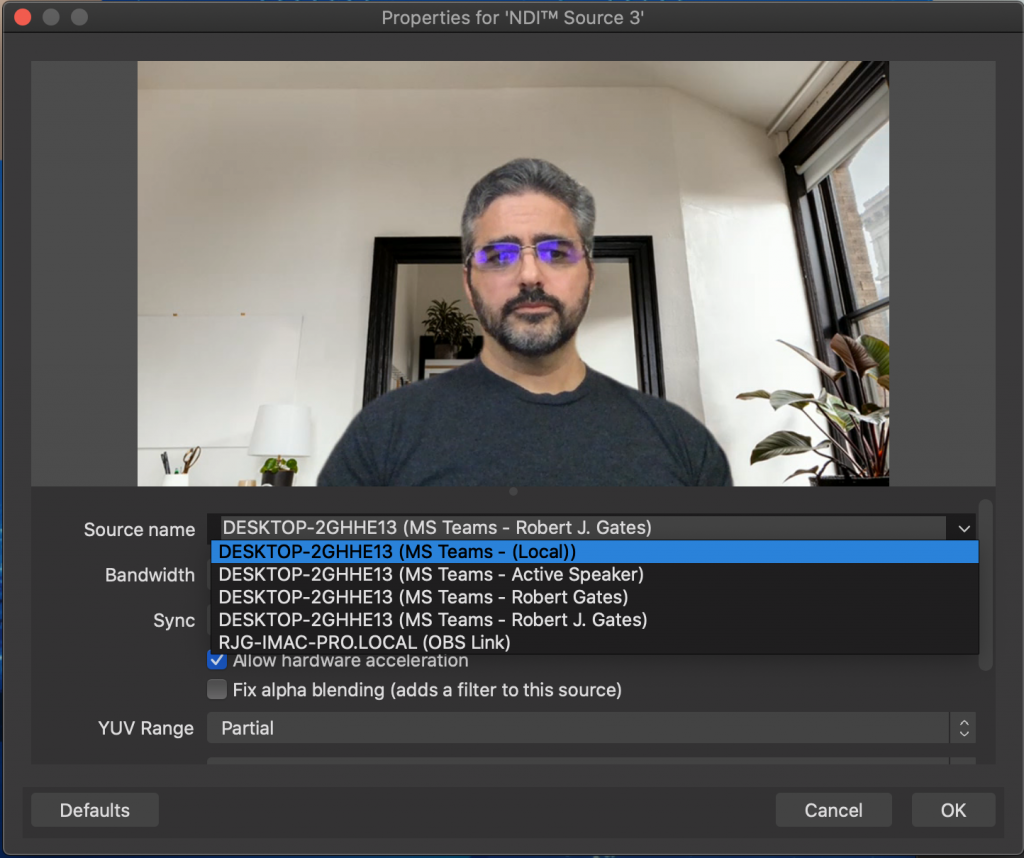
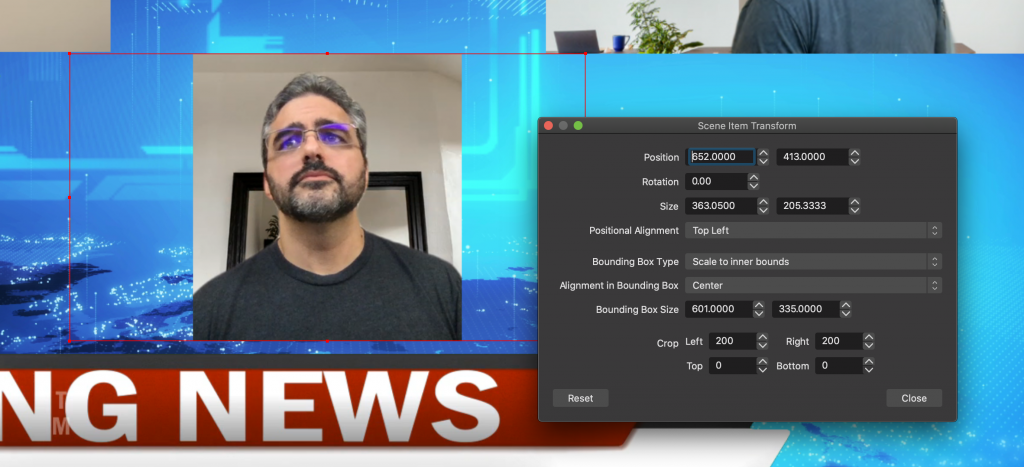
Once I select my NDI stream source, I then have the option to go into the video stream settings and name any adjustments to the size, position, and layout of the video stream.
One important setting that should be set is the Bounding Box Type. Here you want to select “Scale to inner bounds” to prevent your video from resizing if there are network conditions that cause the bandwidth to fluctuate.
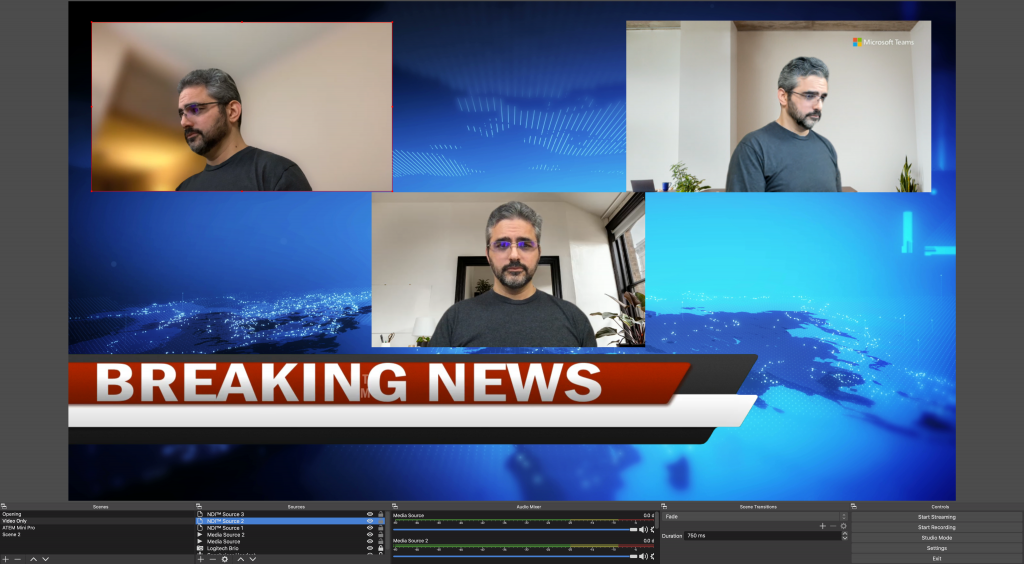
Once you have your video feeds from the various participants in your Microsoft Teams meeting, you can start to layout your scene to create the look and feel you want to present in your live stream or recorded event. In OBS Studio I have the option to stream the content to YouTube, Facebook, Microsoft Teams Live Events, or any platform that supports Real Time Messaging Protocol (RTMP) for real-time streaming of video, audio, and data.
This was just a quick overview, I plan on doing a more in depth video on Microsoft Teams NDI support once I have had some time using it in the real life scenarios. For more details on Microsoft Teams NDI technology support check out the following two links below.
Broadcasting audio and video from Teams with NDI® technology
https://support.microsoft.com/en-us/office/broadcasting-audio-and-video-from-teams-with-ndi®-technology-e91a0adb-96b9-4dca-a2cd-07181276afa3?ui=en-us&rs=en-us&ad=us
Using NDI technology in Microsoft Teams
https://docs.microsoft.com/en-us/MicrosoftTeams/use-ndi-in-meetings


