A feature that I have been looking forward to is the ability to deliver structured and engaging webinars directly from Microsoft Teams. While we have been able to deliver large events using the Live Events feature, there are times where you want to customize the experience and interactivity with some elements of a traditional meeting, with the scale and controls to manage a larger audience. Well, it’s here; Microsoft Teams has rolled out the new Webinar feature to the Microsoft Teams Meeting experience.
So let’s start with the licensing. To utilize the Webinar feature, you need an Office 365 or Microsoft 365 E3, E5, A3, A5, Business Standard, or Business Premium license.
With these licenses, you will get the following features within your Teams experience.
- Ability to create a registration page with email confirmation for registrants.
- Reporting for registration and attendance.
In addition, the interactive meeting experience has been recently updated to support up to 1,000 attendees within a full interactive meeting, and the ability to broadcast the event to up to 10,000 attendees in a view-only experience. (20,000 until the end of the year)
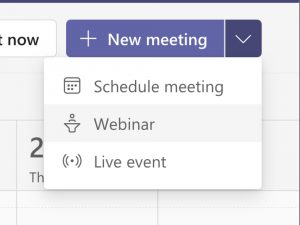
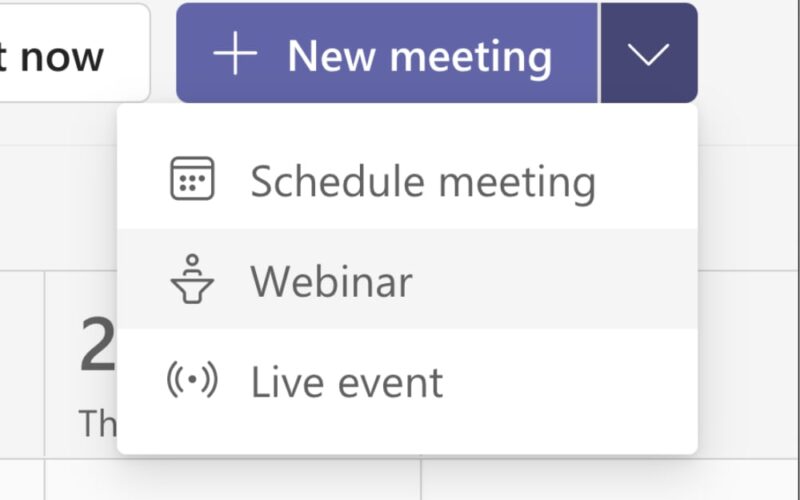
To set up a Microsoft Teams Webinar, you simply go into your Microsoft Teams client, select Calendar, and then click on the new meeting drop-down arrow. The menu will open up to the three options, Schedule a meeting (private meeting), Webinar, and Live event. For webinar events where you want to control the stage, meeting registration, and other event like functions, you will select Webinar.
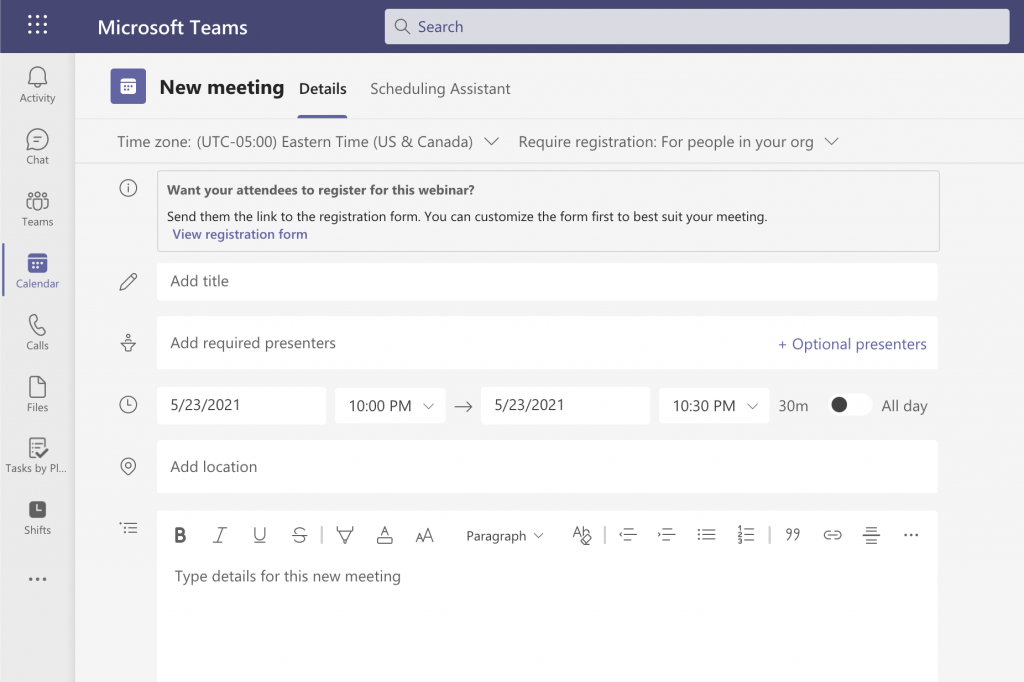
Once you select Webinar, the Microsoft Teams client will open to the meeting invite setup page. The new meeting page contains your standard Microsoft Teams meetings options with a few new elements.
- Add required presenters – As you can see in the screenshot, the field you typically use to invite people to a Microsoft Teams Meeting is where you will invite any presenters you will have for your event.
- Registration Page – The second main addition to this screen is the new registration function for Webinar style meetings. This is where you can customize the registration page with a custom image banner, list the speakers for the event, and setup the data elements required from the attendee’s when they sign up for the event.
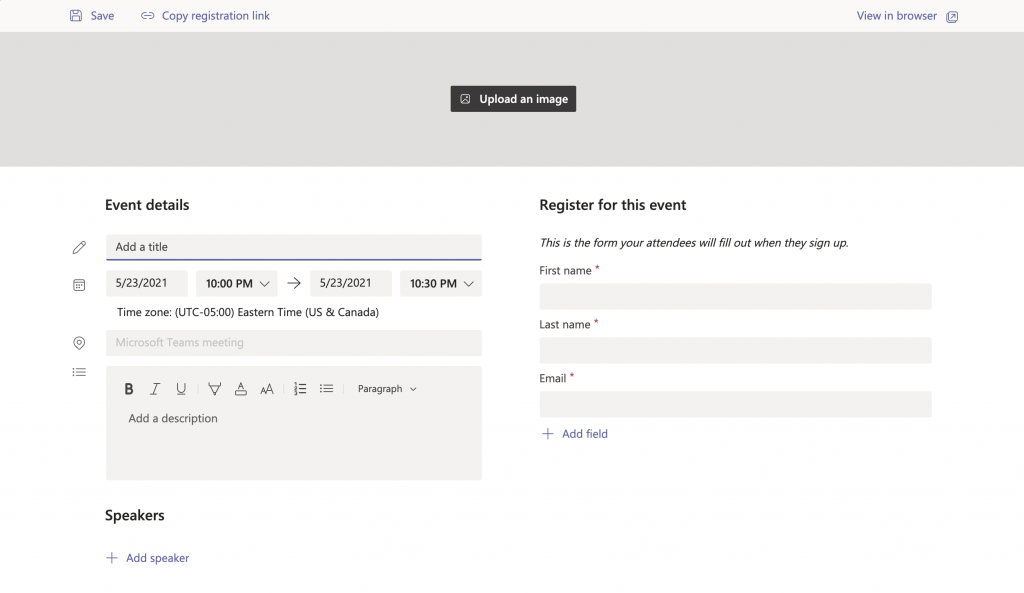
Once you save the settings for the registration page you can copy the registration link and include the link in various marketing and communication methods you plan to utilize to drive attendance to your event.
One thing to be aware of, at the time of this post the setting “For everyone” under the “Require registration:” setting is disabled by default. As a result people across your organization will only be able to schedule Webinar’s with people inside of the organization.
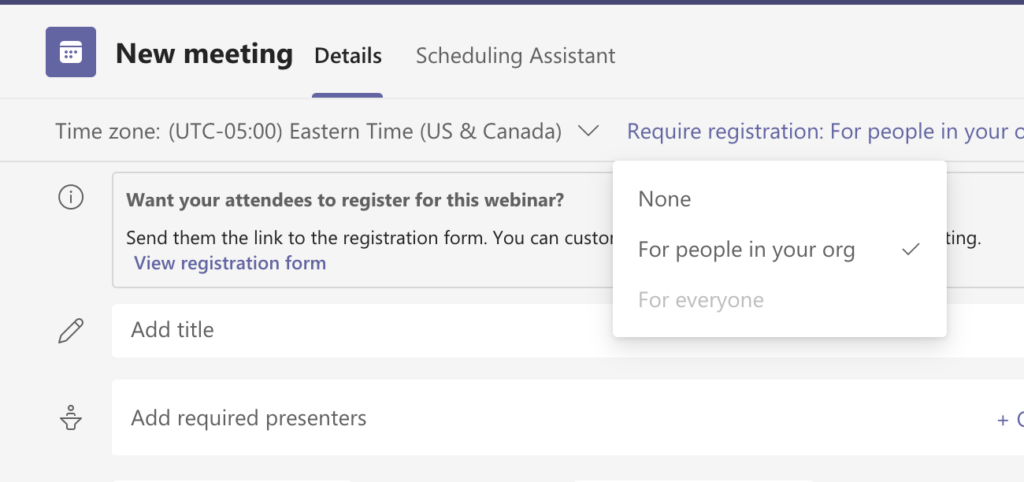
To change this will require you to go into PowerShell as an administrator of the tenant and run the following PowerShell command for each policy assigned to your users you want to enable external invites.
Set-CsTeamsMeetingPolicy -Identity Global -WhoCanRegister Everyone
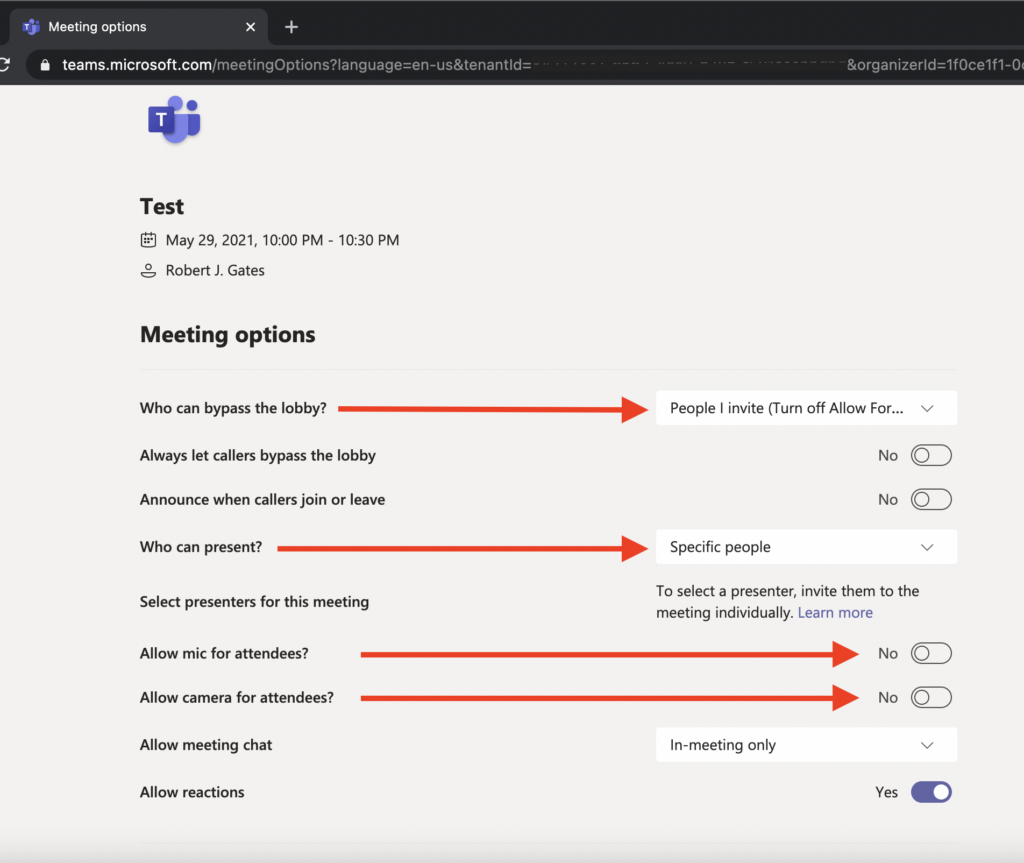
One of the benefits of using the Webinar feature is the meeting option that are enabled by default. All attendees will be placed into the lobby before being entered into the event, presenters will be able to join directly if they were invited. Microphone and Cameras will be disabled for the attendees, but can be enabled during the event if you want to bring someone onto the stage.
For additional details check out the following links below.
Webinar for Teams – Quick Start Guide – https://teamworktools.azurewebsites.net/assets/TeamsWebinarsGetStartedGuide.pdf
Set up for webinars in Microsoft Teams – https://docs.microsoft.com/en-us/microsoftteams/set-up-webinars


